How to Fix Paper Jams in Any Printer
Paper jams are one of the most common and frustrating issues printer users encounter. Whether you’re working at home or in an office, a paper jam can halt your productivity and leave you searching for solutions. Fortunately, fixing a paper jam is usually a straightforward process that anyone can do with a few simple steps. In this guide, we’ll walk you through how to fix paper jams in any printer and offer tips to prevent future occurrences.
Common Causes of Paper Jams
Before diving into the steps for fixing a paper jam, it’s helpful to understand the most common causes:
- Incorrect Paper Size or Type: Using paper that’s too thick, too thin, or not the correct size for your printer can lead to jamming.
- Paper Overload: Overloading the paper tray can cause multiple sheets to feed at once, resulting in a jam.
- Dirty or Misaligned Rollers: Printer rollers help feed the paper into the machine. If they’re dirty or misaligned, they may not grip the paper properly, causing it to jam.
- Old or Damp Paper: Using old or damp paper can cause it to stick together, leading to jams.
- Worn-out Parts: Sometimes, the parts responsible for moving the paper through the printer, such as rollers or the paper feed mechanism, can wear out or get damaged.
Step-by-Step Guide to Fix Paper Jams
Follow these steps to fix a paper jam, whether it’s in your inkjet, laser, or all-in-one printer:
1. Turn Off the Printer and Unplug It
Before attempting any paper jam fix, always turn off the printer and unplug it from the electrical outlet to avoid any risk of electrical shock or further damage.
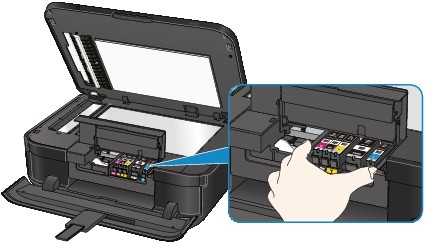
2. Open the Printer Access Panels
Most printers have access panels or doors that you can open to remove the jammed paper. These panels are often located at the back, front, or top of the printer, depending on the model. Refer to your printer’s user manual for specific locations.
3. Gently Pull Out the Jammed Paper
If you can see the jammed paper, carefully pull it out in the direction of the paper feed. Avoid yanking or pulling the paper at an angle, as this could tear it and leave remnants behind.
- For Jammed Paper in the Paper Tray: If the paper is stuck in the tray, gently pull it out by the edges.
- For Jammed Paper in the Paper Path: If the paper is further inside the printer, carefully grasp the edges and pull straight back. If it’s difficult to reach, use a pair of tweezers to remove any small pieces stuck in tight spots.

4. Check for Torn Paper Pieces
After removing the main piece of jammed paper, inspect the printer for any small torn paper pieces that may be stuck in the rollers or elsewhere. These remnants can cause further jams if not removed.
5. Check the Rollers
Once the paper is removed, examine the printer’s rollers. These are the parts that guide the paper through the machine. If they’re dirty or sticky, gently clean them with a soft, lint-free cloth or cotton swab dipped in water or rubbing alcohol. Be sure not to damage the rollers by using excessive force.
6. Reassemble and Test
Once you’ve removed all the paper and cleaned the necessary components, close the access panel and plug the printer back in. Turn it on and run a test print to ensure the jam is cleared and everything is functioning properly.
7. Reset the Printer
If your printer continues to show a paper jam error despite clearing the obstruction, you may need to reset the printer. Many printers have a reset function you can use to clear error messages. Refer to your printer’s manual for specific instructions.
Tips for Preventing Future Paper Jams
Prevention is always better than cure. Here are some tips to avoid paper jams in the future:
1. Use the Correct Paper
Make sure you use the right paper size and type for your printer. Most printers have specific recommendations for paper thickness and weight, so be sure to follow those guidelines to avoid paper jams.
2. Don’t Overload the Paper Tray
Always load the paper tray according to the recommended capacity. Overloading can cause multiple sheets to be fed at once, leading to jams.
3. Keep the Printer Clean
Regularly clean the printer, especially the rollers, to prevent dust and debris from building up. A clean printer operates more smoothly and is less likely to jam.
4. Store Paper Properly
Keep your paper in a cool, dry place to prevent it from becoming damp or curling. This ensures that the paper feeds properly through the printer without sticking together.
5. Replace Worn-out Parts
If your printer is older and frequently jams, it may be time to replace worn-out components such as the rollers, paper feed mechanism, or fuser. Consult your printer’s manual or manufacturer for guidance on part replacement.
Conclusion
While paper jams are a common annoyance, they can usually be fixed quickly with the right approach. By following the step-by-step guide above and practicing preventive maintenance, you can minimize the chances of paper jams occurring in the future. If paper jams continue to be a problem despite following these steps, it might be time to consult a technician or consider replacing parts.
Remember, always handle the printer gently and carefully to avoid causing additional damage. Keeping your printer clean and using the right paper will go a long way in maintaining smooth operation and print quality.


